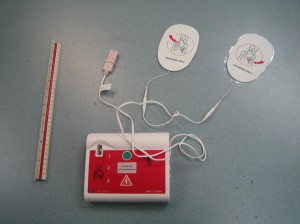
An AED or automated external defibrillator is very popular since even average individuals without medical knowledge can use one to save lives. AEDs are small-sized, portable devices that analyze the rhythm of the heart for any abnormalities and instruct the user to deliver an electrical shock to the heart if required.
An irregular heart rhythm frequently causes cardiac arrest, thus bringing about death. This can be avoided if an AED is utilized to restore the proper rhythm of the heart. These devices can be utilized under different circumstances, but there are certain precautions to follow if it will be used during rainy conditions.

Steps to follow when using an AED when raining
- Confirm if the individual is unresponsive by shaking his/her arm or calling out loudly. Take note than an AED can be used in different environments including snow and rain, but make sure that you or the individual is not in a puddle of water when using an AED. Once you have called emergency assistance, move the individual to a dry and safe place.
- Check the individual for a pulse by pressing two fingers beneath the jaw bone against the carotid artery in the neck. You have to verify if the individual has no pulse before using the AED.
- Remove the shirt or blouse of the individual to expose the chest area. In case the chest is wet, wipe the area using a clean cloth and make sure that it dries before using the AED. Check the surroundings to ensure that water is not collecting on the ground around you or the individual. Always follow the manufacturer instructions when using the device, especially during rainy conditions.
- Turn on the power and follow the voice prompts of the device so that you will be guided during the analyzing phase and when delivering the electrical shocks if needed. Detach the adhesive paper from the back of the electrode pads and follow the voice or screen prompts to direct you with the proper placement of the electrodes. Place one pad on the right center of the chest just above the nipple and place the other pad on the left side beneath the nipple and pectoral muscle.
- You have to verify that no one else is touching the individual and then press “ANALYZE” on the device. The AED will analyze the heart rhythm of the individual and will instruct if an electrical shock is required. If the “NO SHOCK” message appears, it indicates that the individual has a pulse or the heart rhythm could not be treated with an AED. Take note that you cannot deliver an electrical shock unless the device registers that it is required.
- If a shock is required, you have to deliver one. Make sure that no one else is touching the individual and then press “SHOCK” to deliver an electrical current to the heart. Once the first shock is given, press “ANALYZE” again to assess the heart rhythm of the individual.
- If a second shock is required in order to restore the normal heart rhythm, you have to deliver another one again. Always bear in mind that the AED will automatically adjust the amount of energy given for every shock, ensuring that the right amount is given. Once the second shock is given, analyze for the third time and deliver a third shock if indicated by the AED.
